Digital Photography & Imaging / Project 1

Table of the contents
1.Lectures
2.Instruction
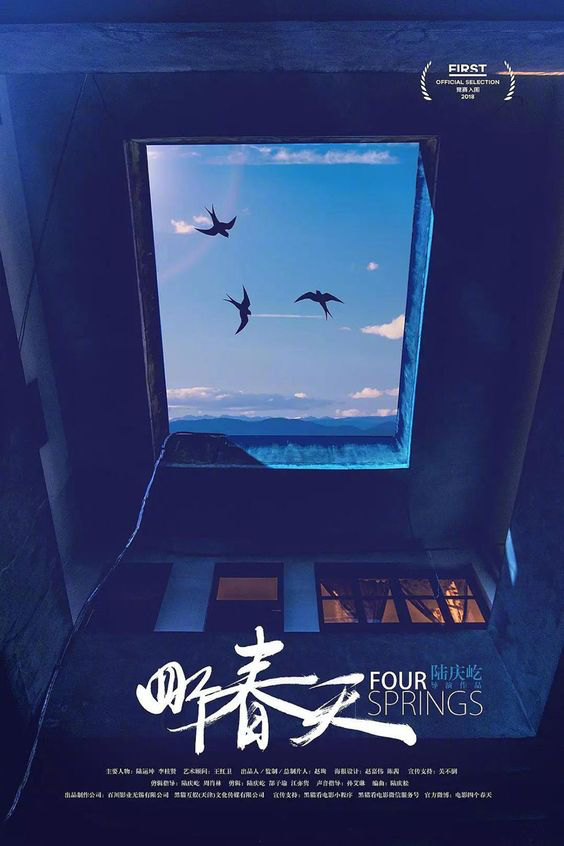
3.Three of my favorite posters on the Internet
4.PROJECT 1A: COLLAGE DESIGN ELEMENTS
5.PROJECT 1A: PHYSICAL COLLAGE final review
6.PROJECT 1B: Digital Collage review
7.PROJECT 1B: DIGITAL IMAGING EXERCISE
8.PROJECT 1B - PART 2: Recoloring Black and White
9.FEEDBACK
10.Reflections
LECTURES
Week 1 / Introduction to Digital Photography and Imaging


| Scale is often used to help communicate hierarchy by drawing attention toward and away from certain elements |
BALANCE THE ELEMENTS

fig 1.3
WHITE SPACE

Rule of Thirds.  |
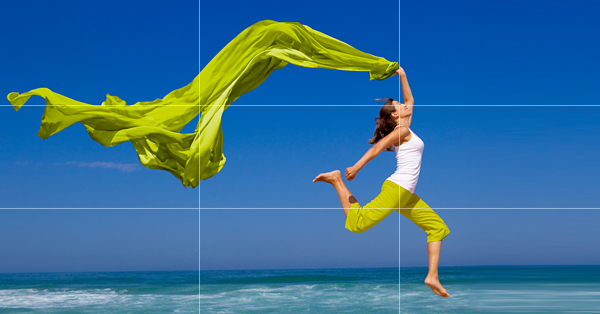
When you position the most important elements of your image at these intersection points, you produce a much more natural image. It is also suggested that any horizon is placed on either the top horizontal line or bottom horizontal line.
The three-point rule is one way:
Use natural and pleasing composition skills.
Creative use of negative space.
Create a dialogue between the topic and the background.
Week 3:
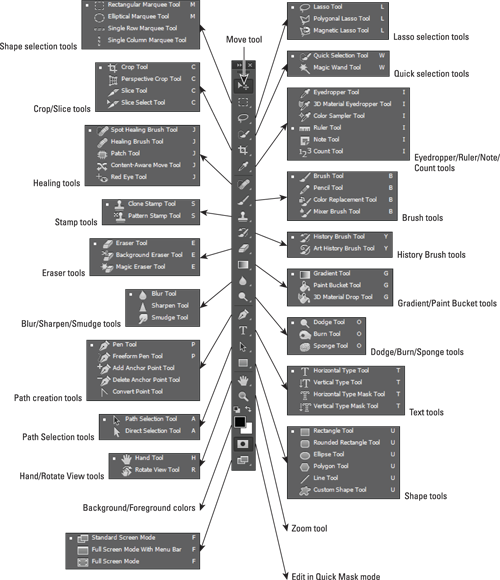
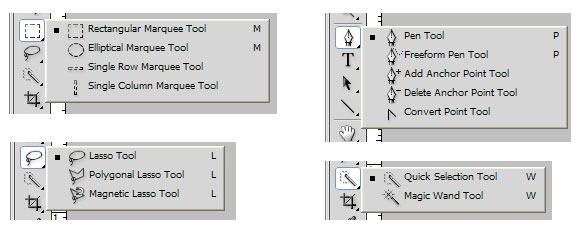
How to Use the Lasso Tool
 fig 1.12 |
The Lasso Tool allow you to draw and pinpoint specific areas of a document. |
When you click on the Lasso Tool from the Toolbar, you will see three different tool options:
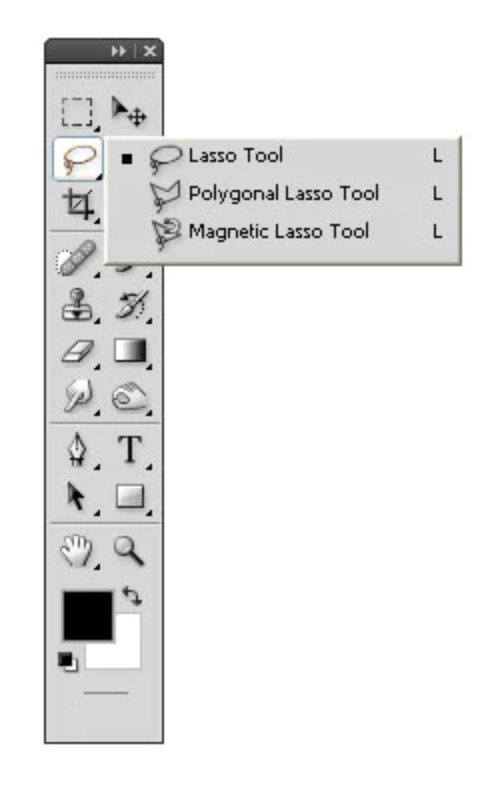
Lasso
Polygonal Lasso
Magnetic Lasso
How to Use the Pen Tool
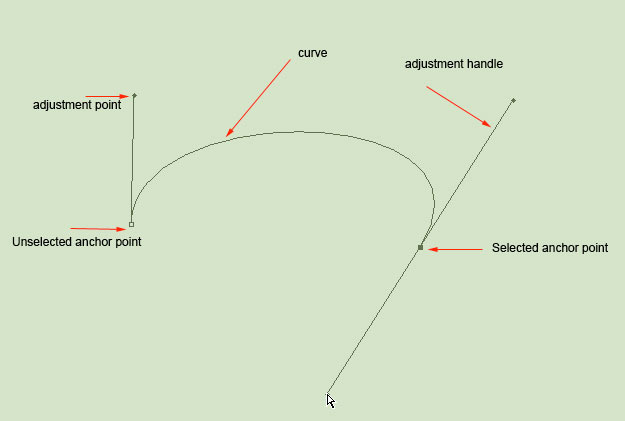 |
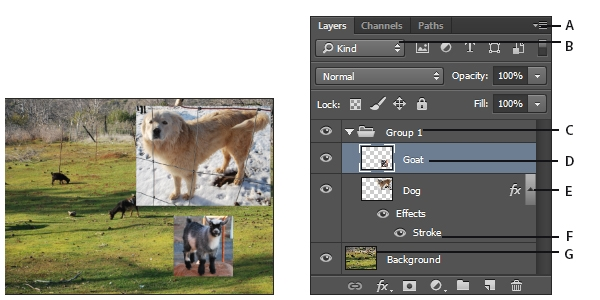
The pen tool is the way that you add these points and the way you drag the tool as you create the points determines how they will look. fig 1.14Variation of Pen Tool 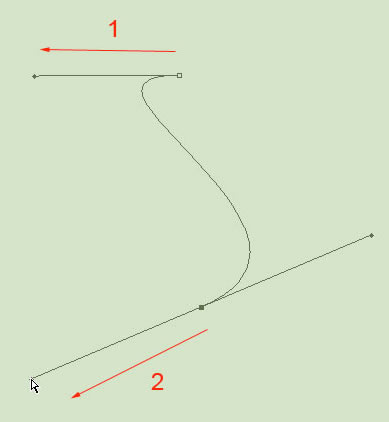 fig 1.15 How to Use the Pen Tool Layering How to use Layer in Photoshop we can use each layer without affecting another one to make adjustments. |
REFERENCE:
Week4
Introduction to Photoshop 3
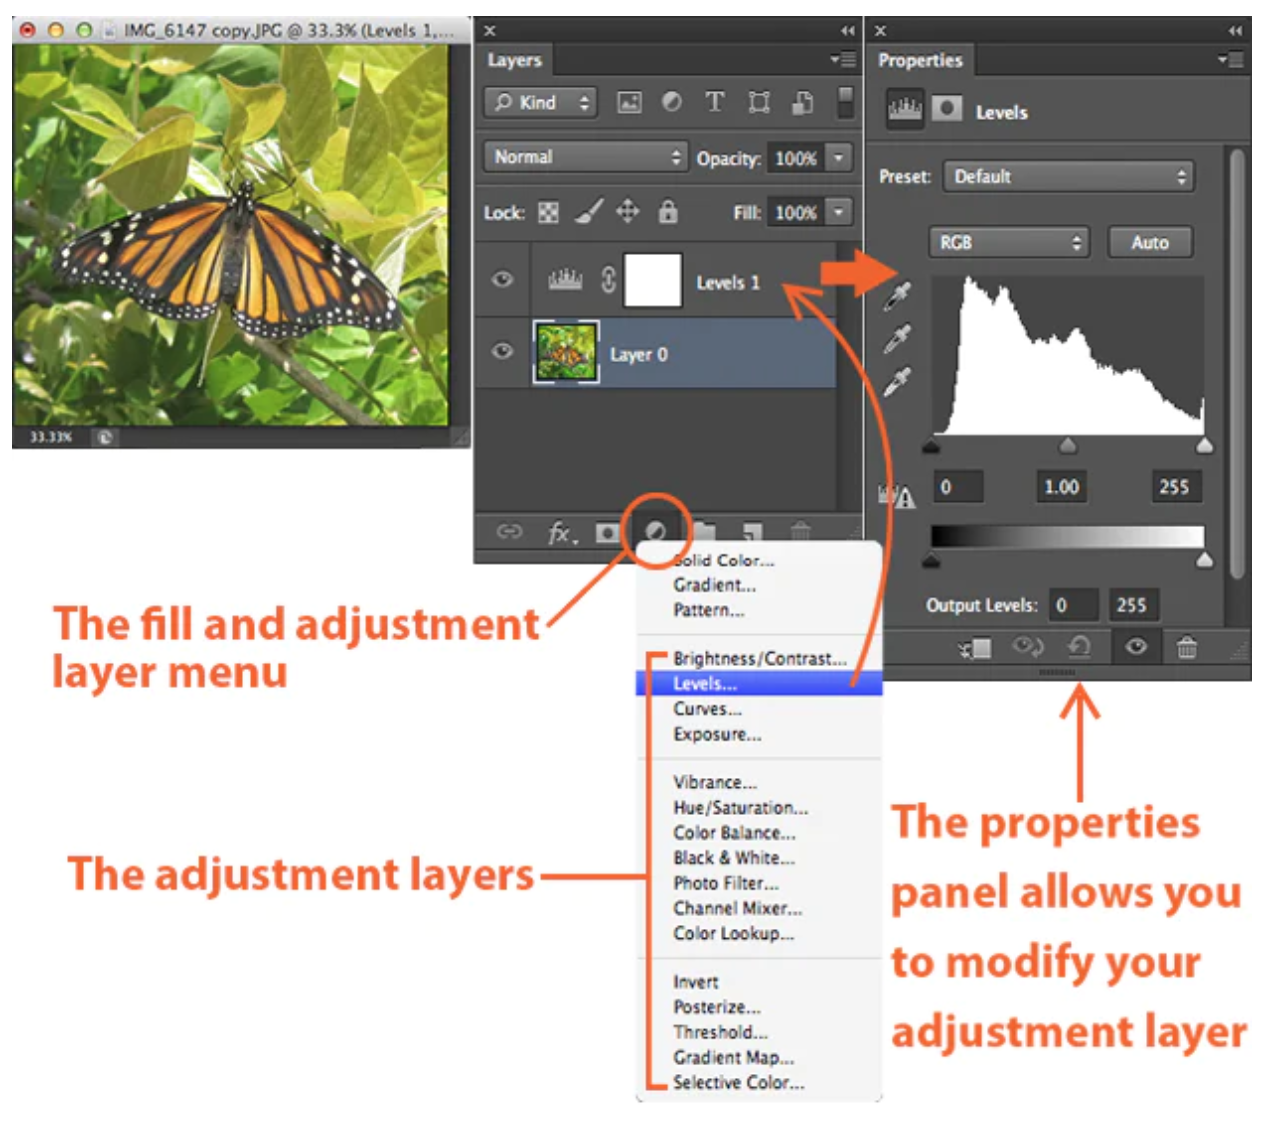
Adjustment Layer & Filters
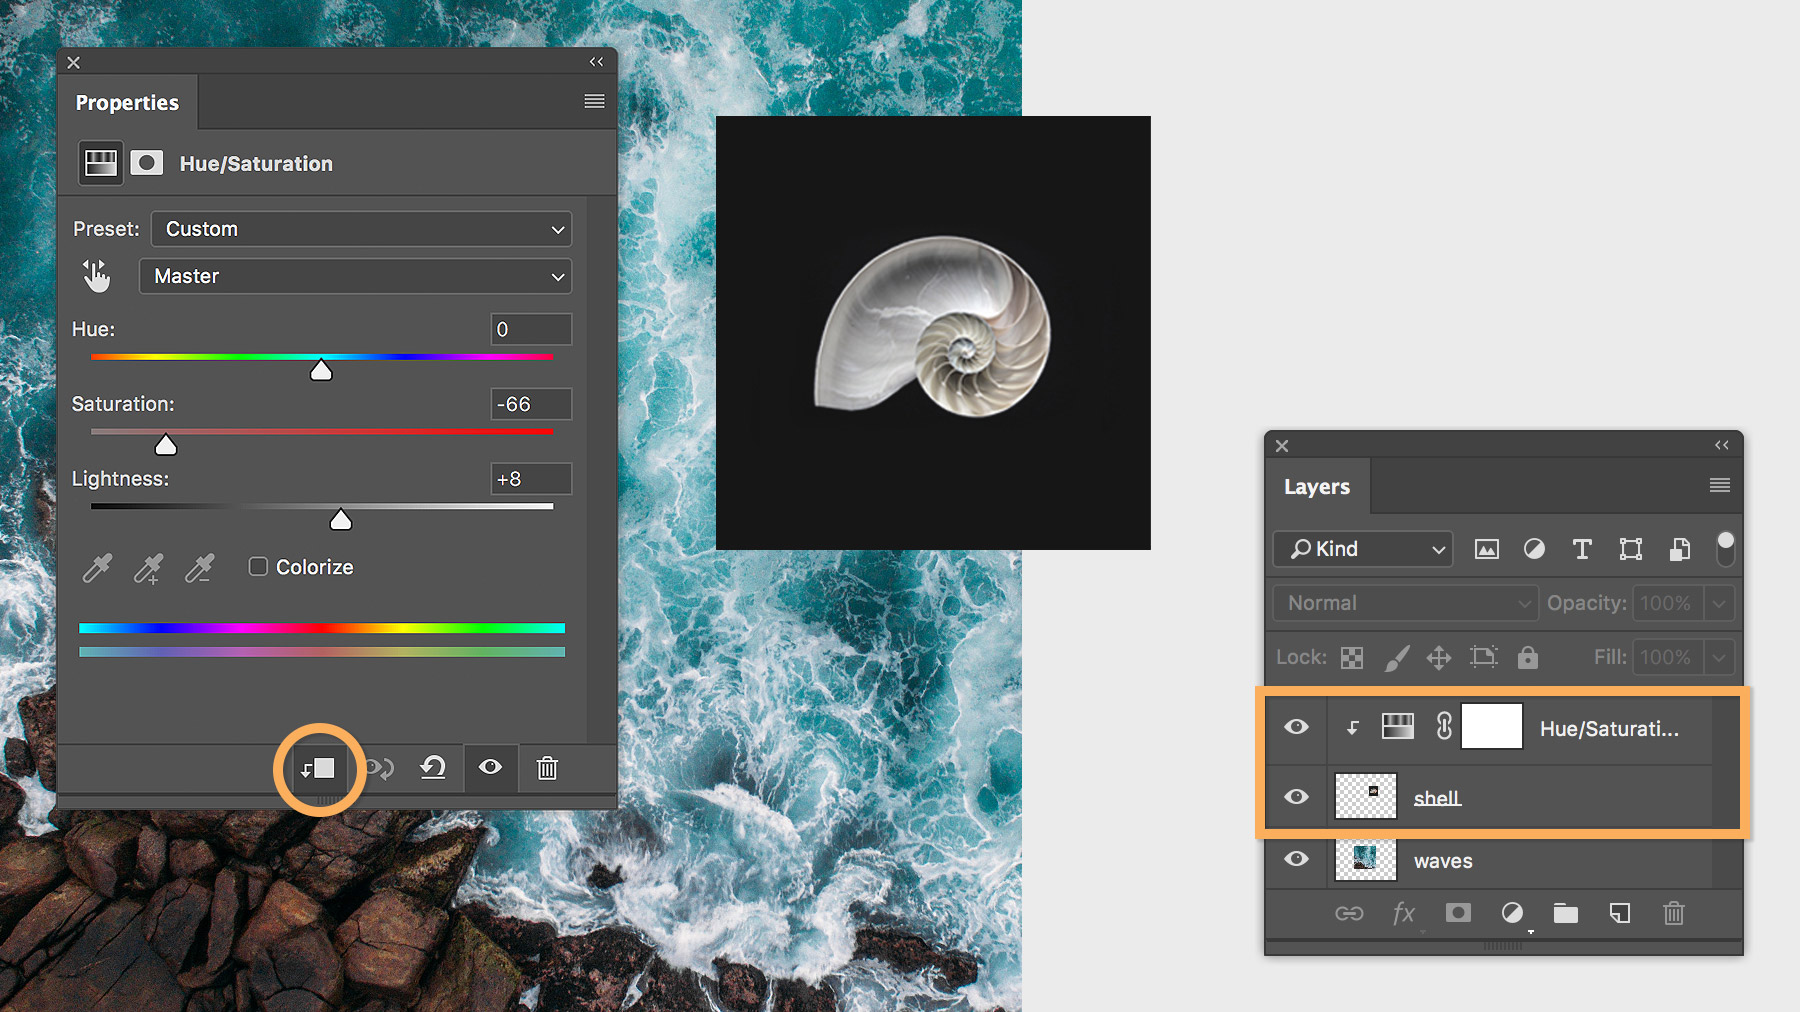
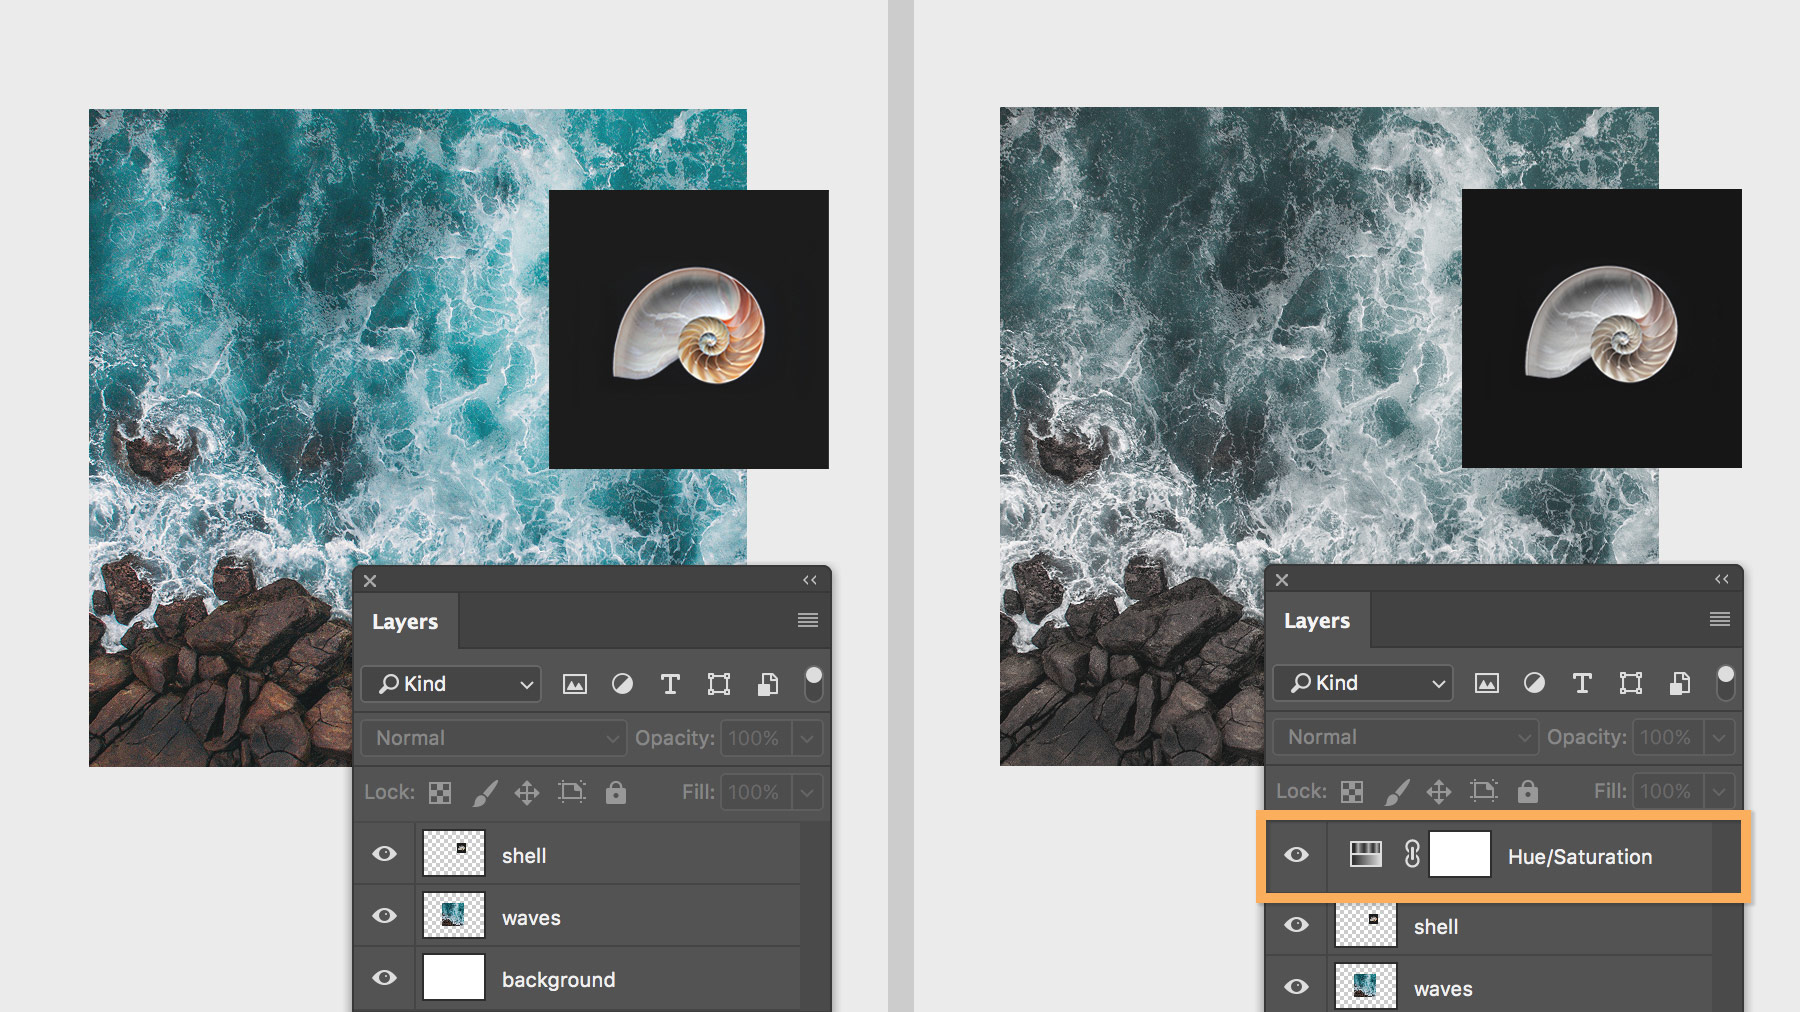
Adjustment Layer
Adjustment Layer
& Filters
fig 1.17
The Adjustment Layers in Photoshop are a group of a super useful, non-destructive image editing tools that add color and tonal adjustments to your image without permanently changing its pixels.
fig 1.18
Basic understanding of Adjustment Layer
fig 1.19
The Properties panel will allow you to modify your adjustment layer,
which in turn will modify your image.
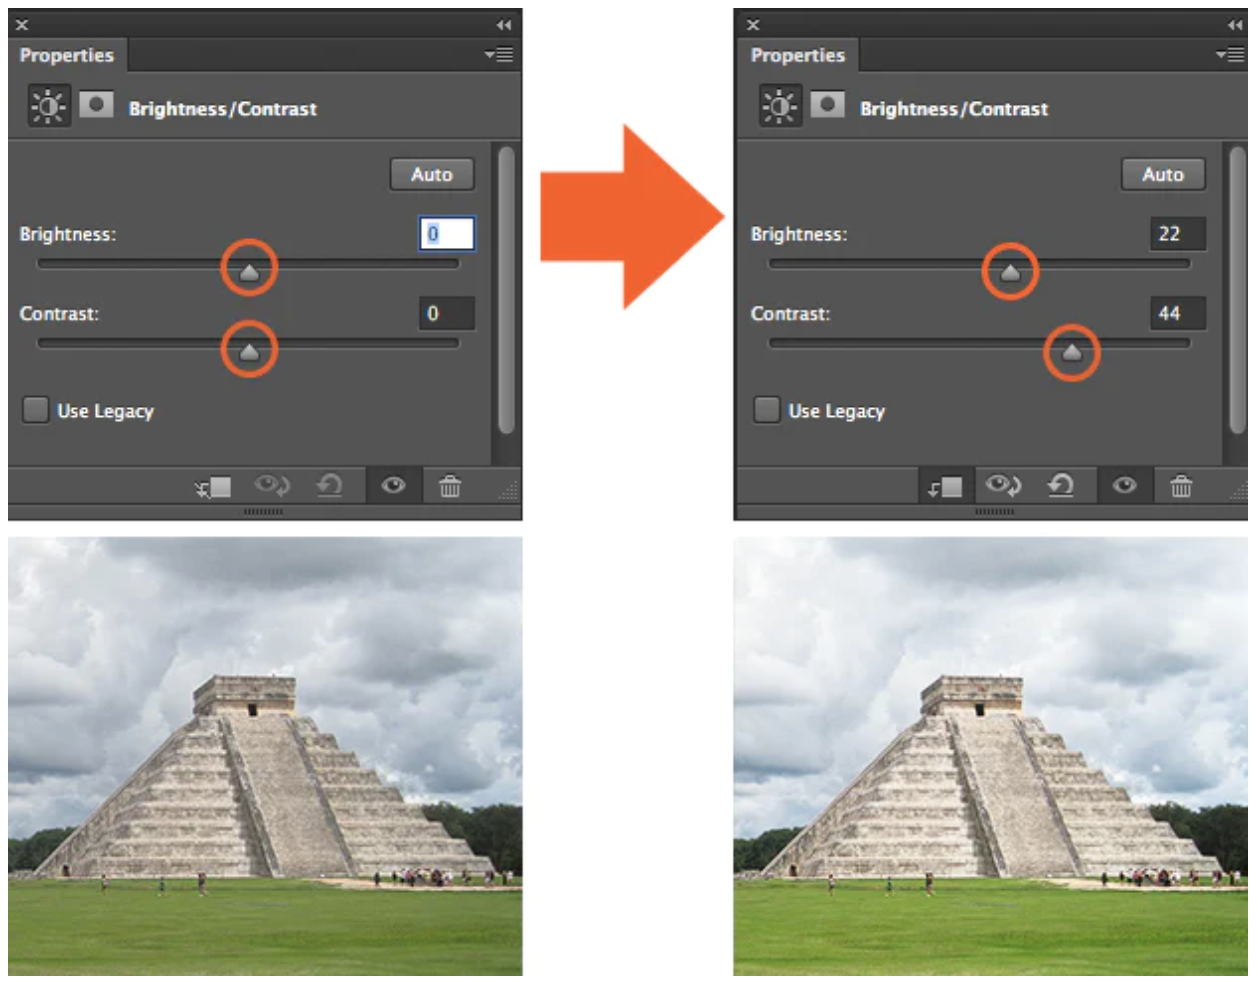
1. BRIGHTNESS / CONTRAST
fig 1.20The brightness slider is for adjusting the highlights in your image and the Contrast slider is for adjusting the shadows in your image.
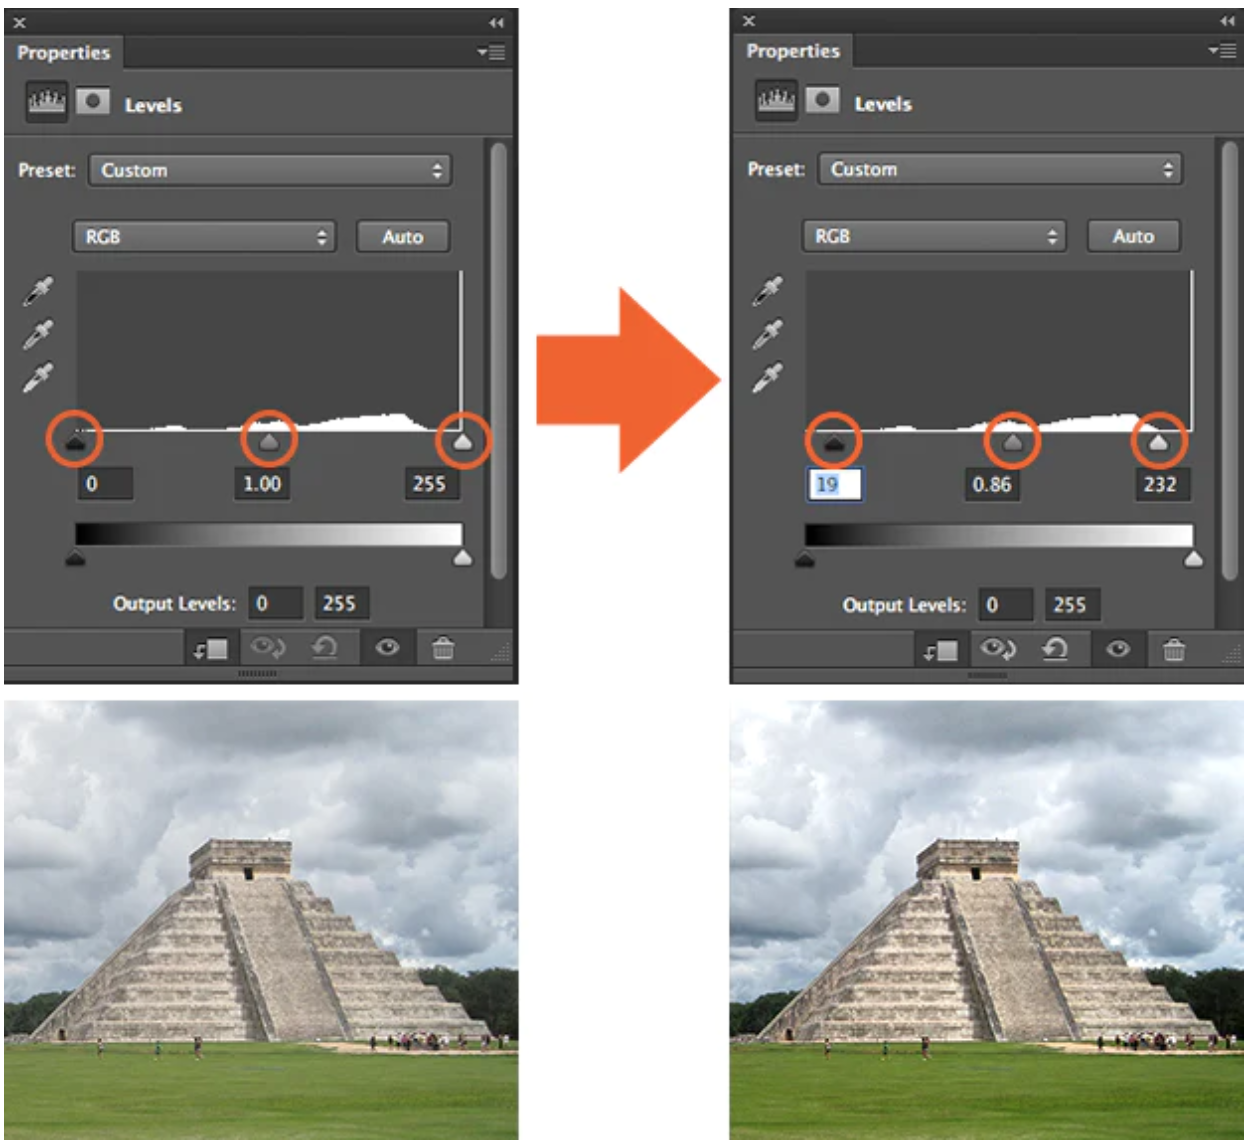
2.LEVEL
Levels modify the tonal values in an image by adjusting the levels of the shadows, midtones, and highlights.
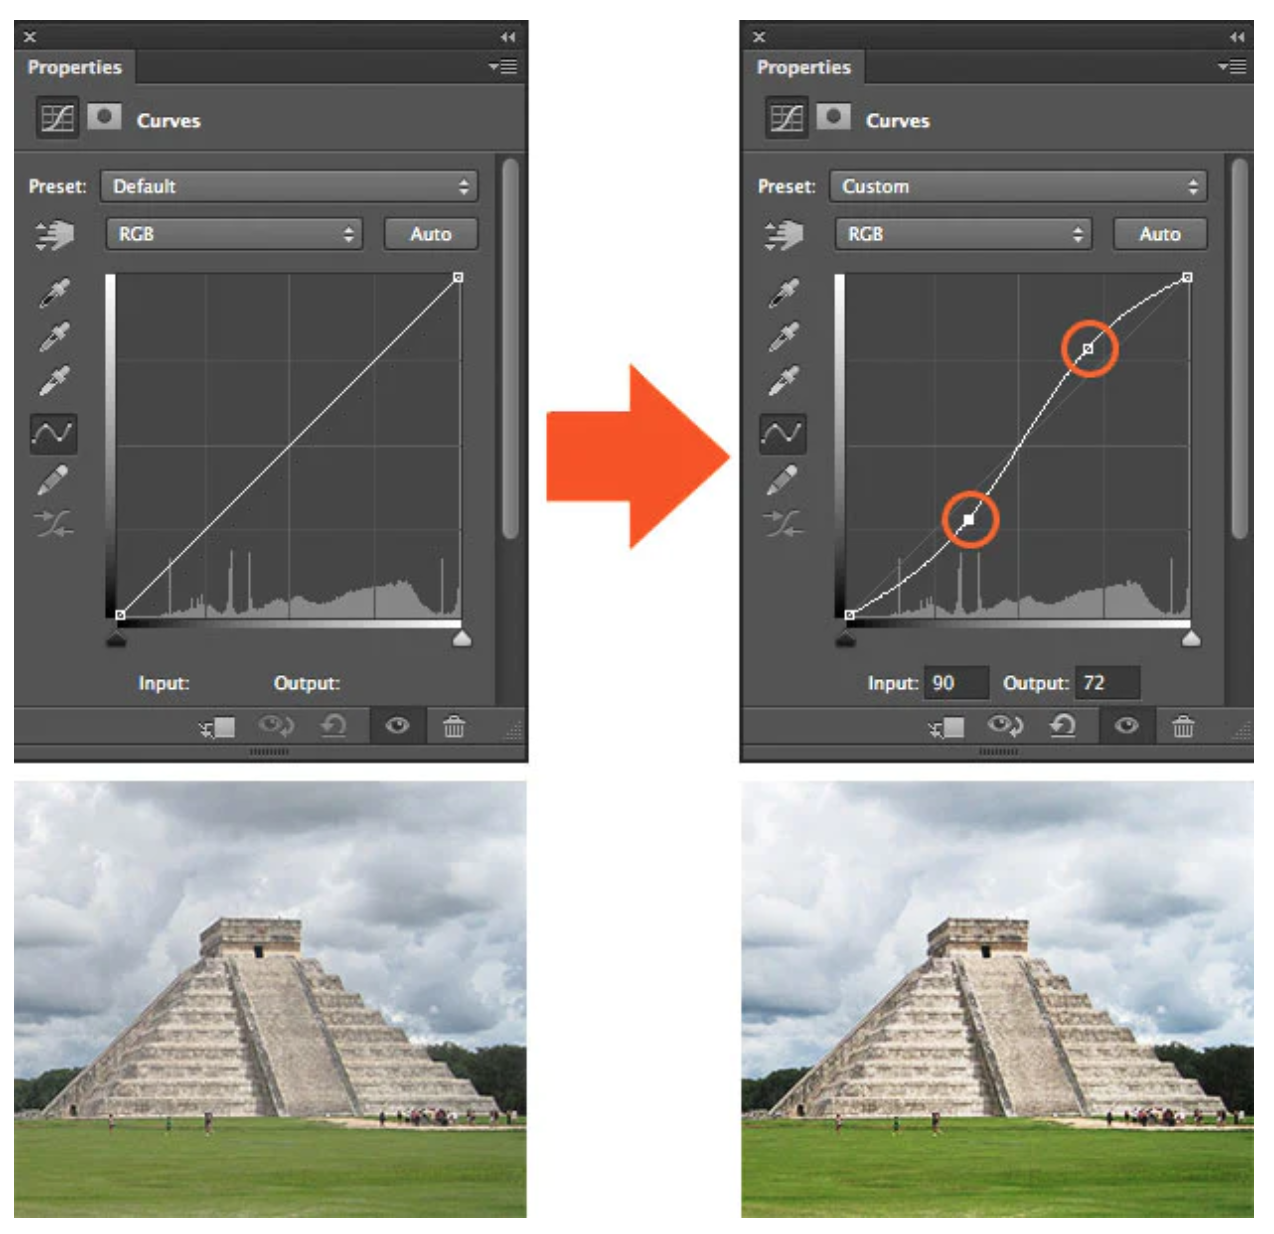
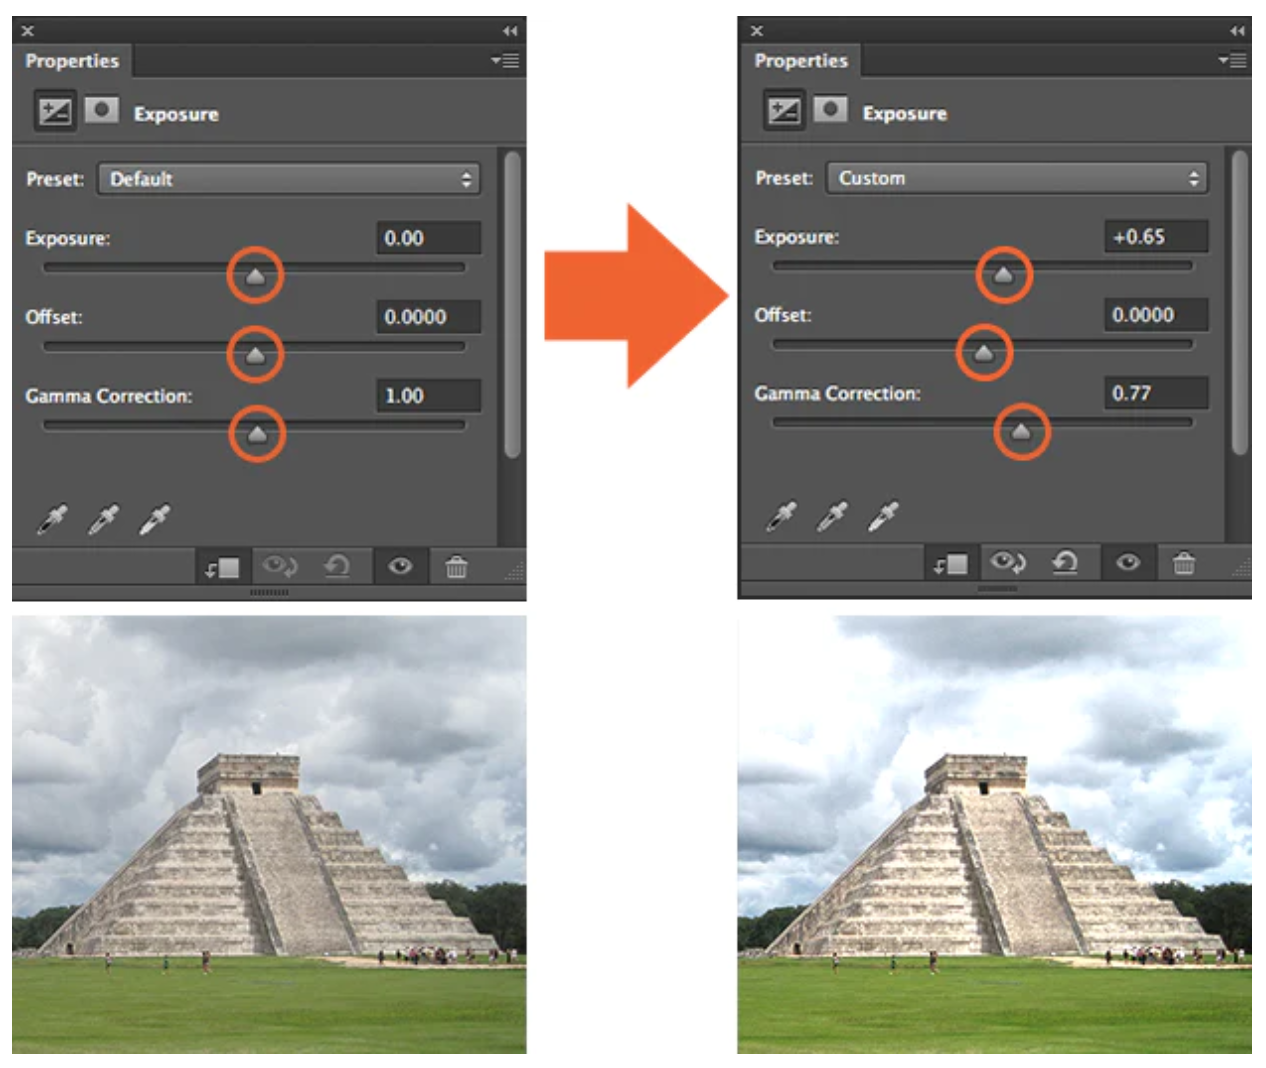
3. CURVESCurves let you adjust as many points as you want throughout the entire tonal range of your image4. EXPOSUREfig 1.21Exposure lets you adjust exposure levels with three sliders: Exposure, Offset and Gamma.
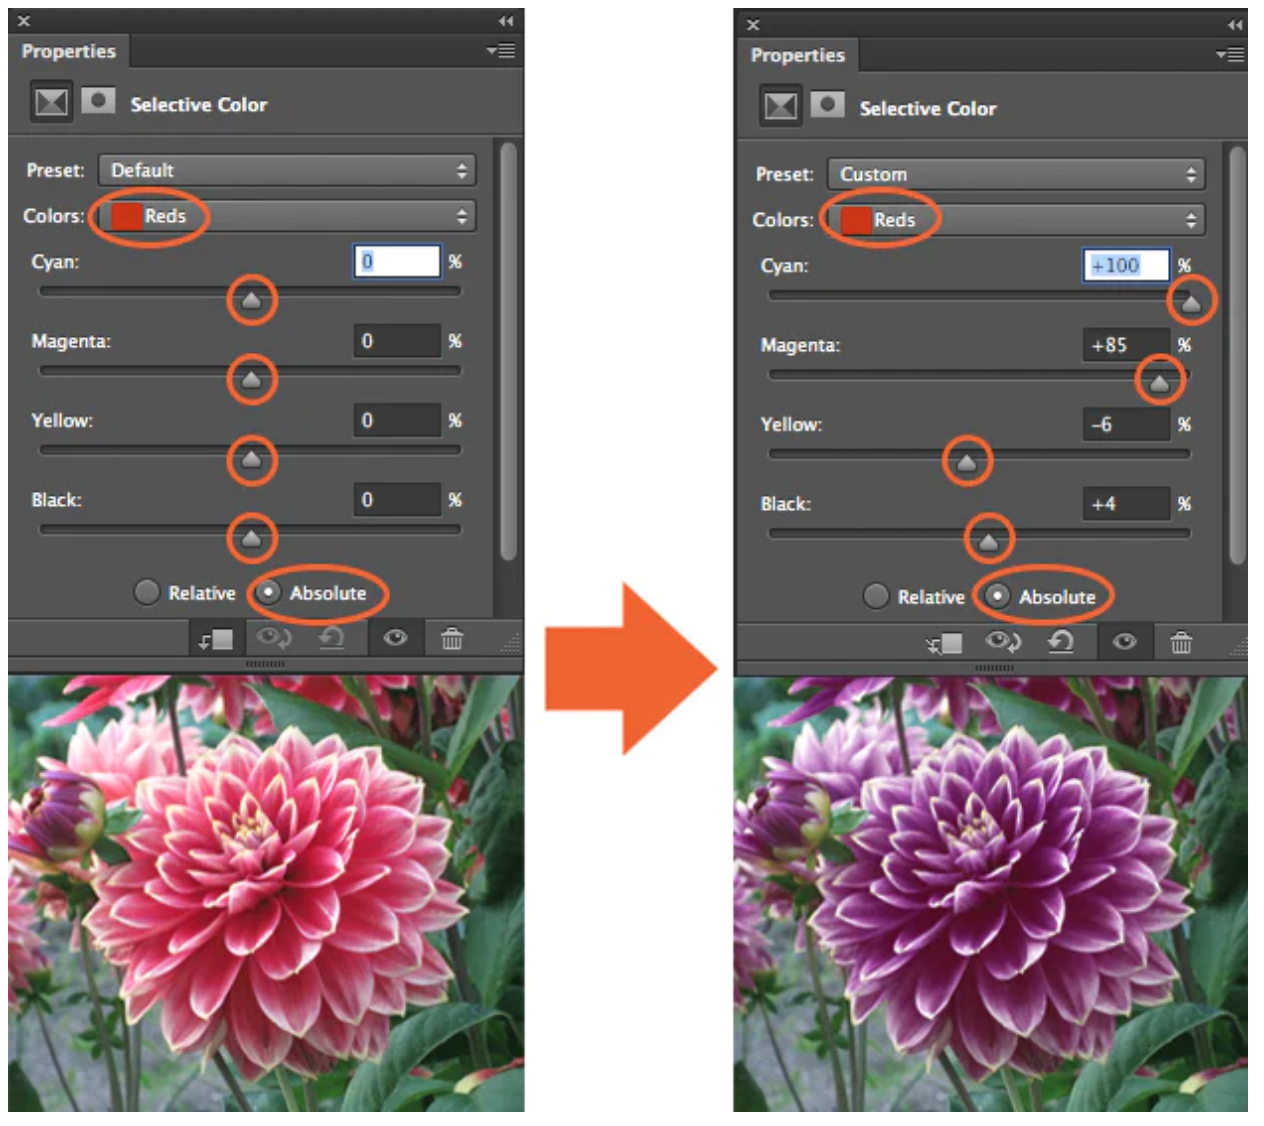
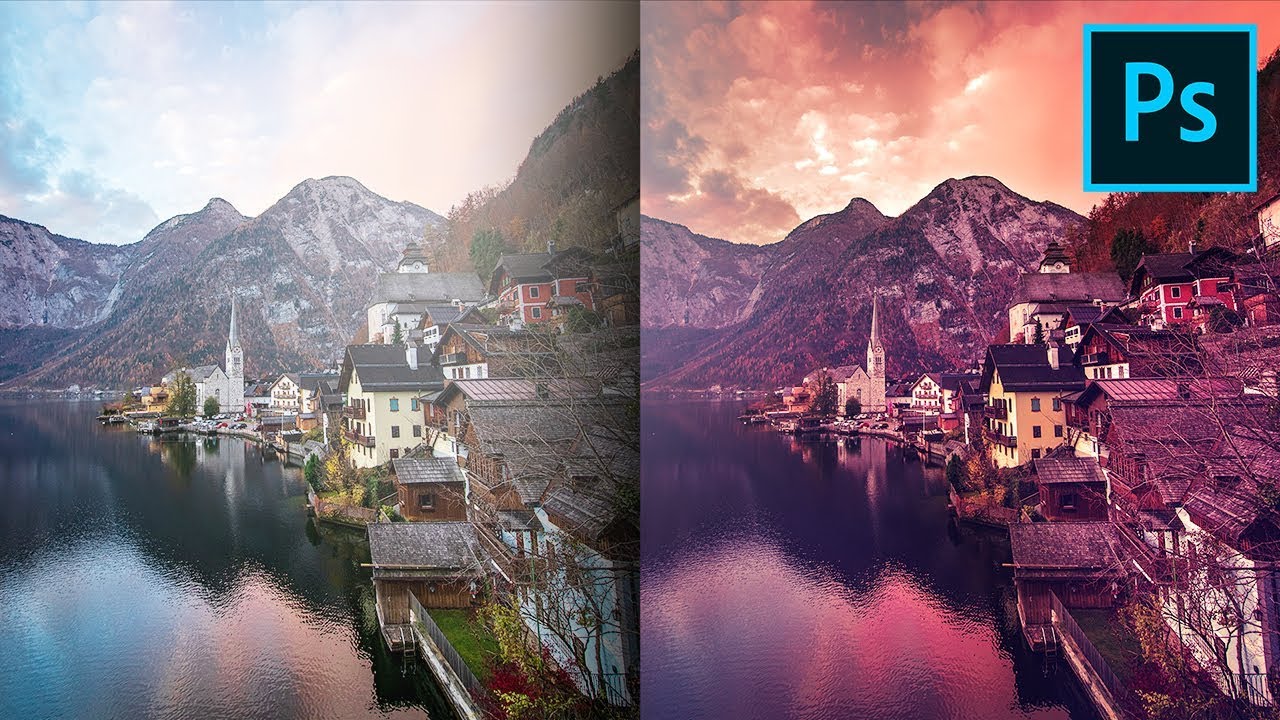
5. SELECTIVE COLORfig 1.22The Selective Color adjustment layer selectively modifies the amount of a primary color without modifying the other primary colors in your imageFiltersUsing filters to edit photos is an essential element of Adobe’s graphics editor.
fig 1.24
REFERENCE:
How to use Adjustment Layer.
Photo filter trick in Photoshop
https://youtu.be/gDSbfx67MLg
Photoshop filters
https://fixthephoto.com/photoshop-filters.html#:~:text=Photoshop%20i
mage%20filters%20are%20defined,retouching%20and%20improve%20image%20quality.
Week 5: Basic Photography Shooting
Exposure in photography refers the amount of light that reaches your camera sensor or film is known as exposure in photography.The main parts of the camera:
Camera body:
Shutter
Image sensor
LCD screen
Camera lens:
Aperture/ Iris
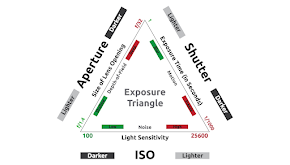
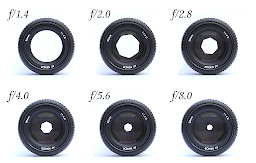
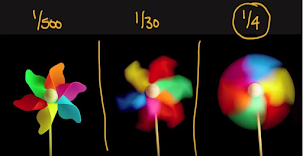
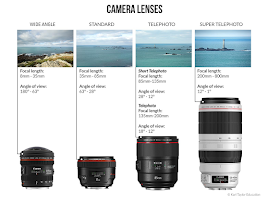
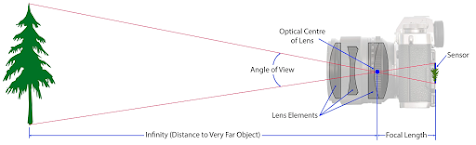
Figure1.25 Exposure setting1. IRIS: Iris and aperture work together to regulate how much light enters the lens.The following f-number sequence indicates the f-stop, which is used to measure iris/aperture: f/1, f/1.4, f/2, f/2.8, f/4, f/5.6, f/8, f/11, f/16, f/22, f/32.2. SHUTTER SPEED: The following shutter speeds are expressed in seconds: 1/1000, 1/500, 1/250, 1/125, 1/60, 1/30, 1/15, 1/8, 1/4, 1/2, 1 s, 2 s, and 3 s.3. Camera ISO settings that are commonly used include: 100, 200, 400, 640, 800, 1600, 3200, 6400.4. The right lens Angle of view is affected by lens choice, given desired framing.Figure 4.2 IRIS Figure 4.3 Shutter SpeedFigure1.26SO Figure 1.27Lens PerspectiveFocal Length: The distance, expressed in millimetres, between a camera lens's optical centre and its sensor is known as the focal length.Figure 1.28Focal Length

2.Instruction
Play the video of him creating physical collages as a tutorial for making collages.
Play the video of him creating physical collages as a tutorial for making collages.
Practical
1 Create your electronic portfolio blog.
https://youtu.be/Q9H-8-MQKpc?t=41
Electronic portfolio link:
https://huangjiaqi0503.blogspot.com/
2. RegisterPinterest
Pinterest(DPI):
https://www.pinterest.com/hiq200523/dip/

Description:
When I first laid eyes on this poster, I was captivated by its colors. The artwork boasts a striking contrast, both in terms of color and shape. Despite the vividness of the colors in the scene, they are harmoniously balanced throughout the composition.

4.PROJECT 1A: COLLAGE DESIGN ELEMENTS


1 Confident Charisma:
This collage artwork showcases the perfect fusion of confidence and charm in women. Through vibrant and self-assured images, it presents the charisma and self-assurance women exude in different settings. From natural beauty to high-fashion flair, each image conveys an innate sense of power and confidence. This piece celebrates women's self-affirmation and inner beauty while also paying tribute to their strength and courage across various spheres of society.
2. Beauty of Freedom:
The collage "Beauty of Freedom" captures the spirit of female liberation. Through diverse imagery and text, it showcases women's free expression and independent spirit in various settings, conveying their pursuit of freedom, vitality, and independence. This piece celebrates contemporary women's confidence and autonomy while reflecting their pursuit of freedom and equality. It serves as a reminder that men's rights should not supersede women's, advocating for gender equality and women's equal participation in political, economic, and social life.
3. Fashion Consumerism:
This collage delves into the impact of contemporary fashion consumerism on women's lives. Through logos of fashion brands, photos of celebrities, and images of shopping scenes, it illustrates women's pursuit of fashion brands and consumer goods. The artwork integrates reflections on the phenomenon of consumerism, prompting viewers to contemplate their consumption behaviors and values. It also reflects the contemporary society's emphasis on external image and material pursuits.
The essence of women's liberation, the impact of fashion consumerism, and the perfect blend of confidence and charm collectively portray the contemporary woman's pursuit of autonomy, reflection on consumption behaviors, and display of strength and courage in life.


6.PROJECT 1B: Digital Collage review

INSTRUCTION:
Follow the step-by-step video to edit it in photoshop: https://youtu.be/b6XqlUP-MUA
Download the images here:
https://drive.google.com/drive/folders/1d8wBC-qsBMhnzfROB4KqtXiTlvwfy-4_?usp=sharing
I know that I did not have the process at that time and did not take a screenshot in time, but I still continued to finish it step by step according to the teacher's video, noticed the important problems and learned how to P photos in a new environment.
Process
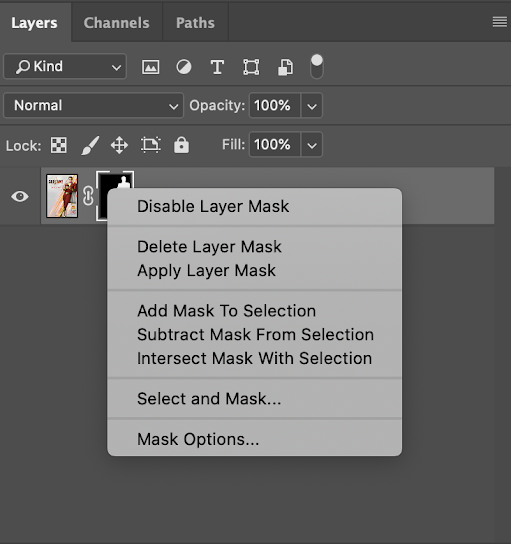
fig 2.11
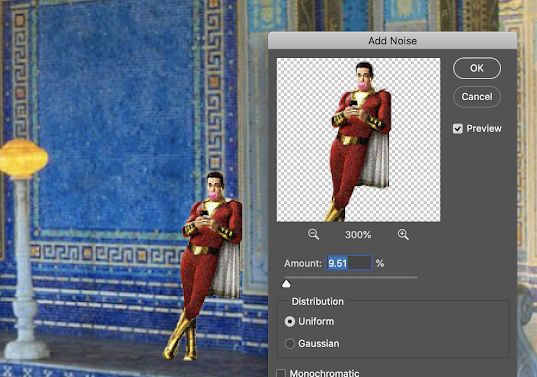
fig 2.12
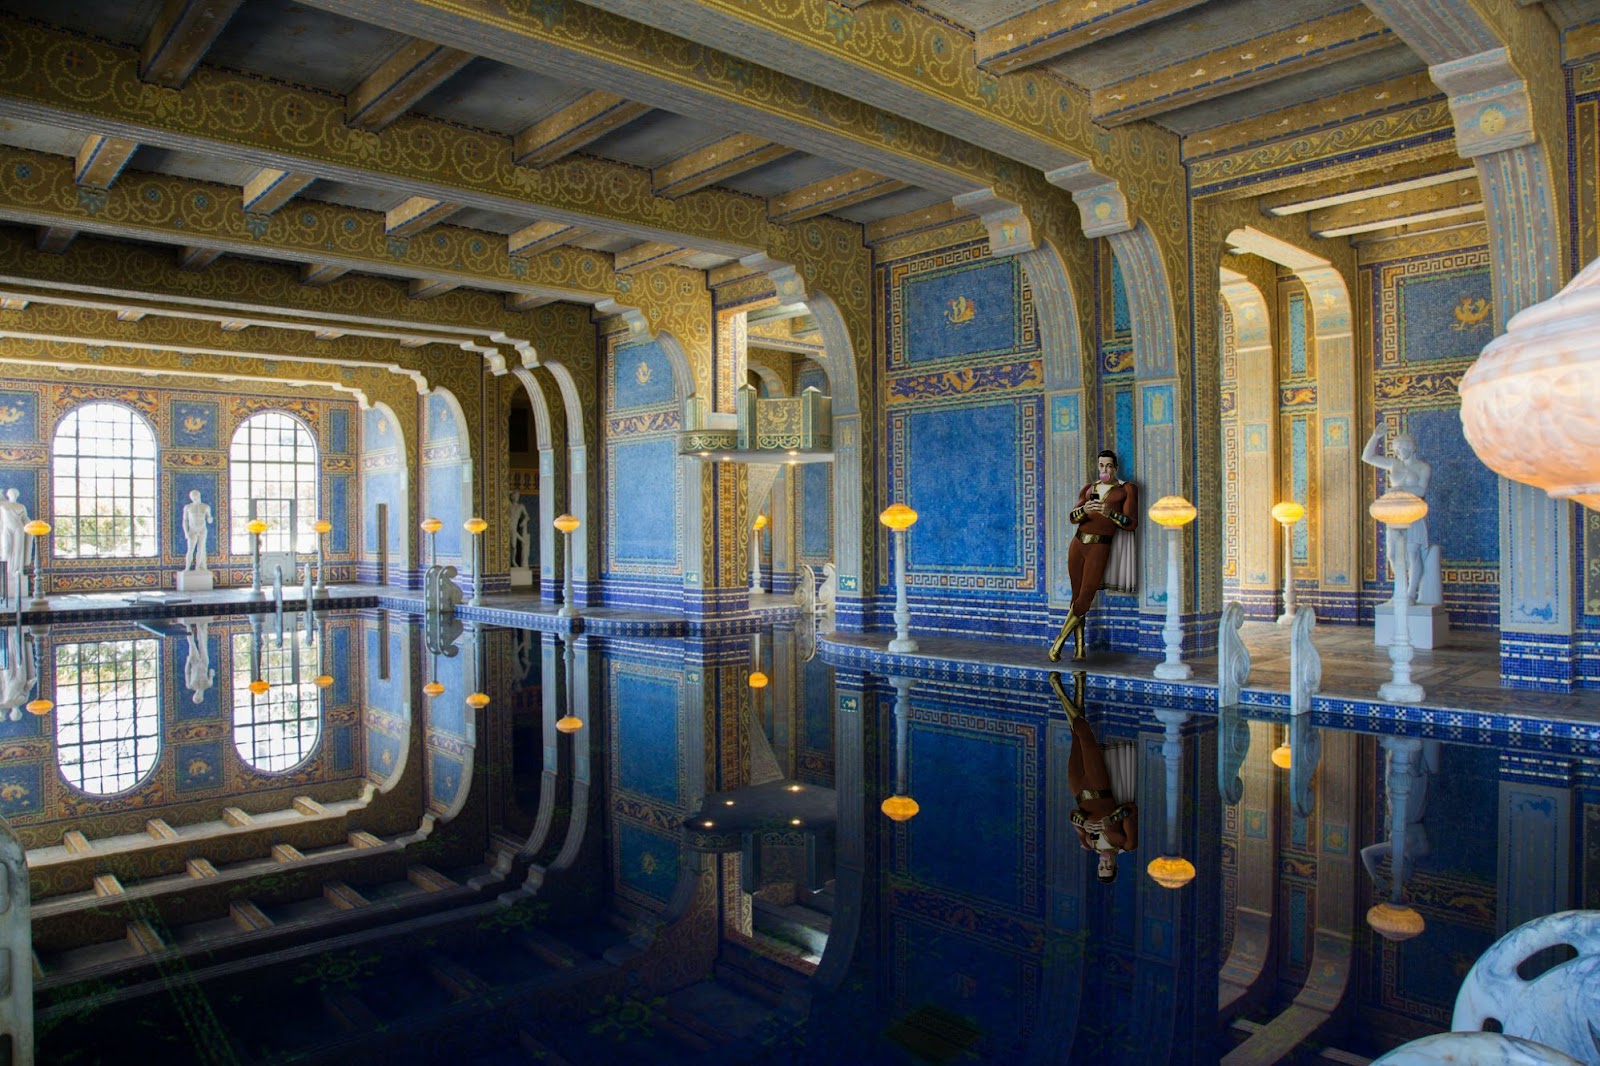 |
| fig 2.13 first outcome |
Next is to use their own photos to complete this homework, pay special attention to is that a figure put on, the shadow is not the same, according to their own judgment and light to decide where the shadow is.

OBJECTIVE: Turn B&W photo into COLOUR photo
DOWNLOAD THE IMAGE HERE: https://drive.google.com/file/d/1iYbFpDqdTjdHzkBpLWLkFwPJut6N8ItA/view?usp=sharingVIDEO TUTORIAL: https://youtu.be/DeGpKh6pMfk
fig2.15 PROJECT 1B - PART 2: Recoloring Black and White
process
According to the ppt and video sent by the teacher, I learned that when coloring a black and white photo, I should build new coatings one by one, apply the five features with the brush tool, then apply the color I want, and finally choose overlay in the coating to make the whole look more natural.

fig2.16 PROJECT 1B - PART 2: Recoloring Black and White Step


Comments
Post a Comment