Digital Photography and Imaging - Project 2

5/06/ 2024
TABLE OF CONTENTS
2.Instrustions
3.Project 2A:DOUBLE EXPOSURE
4.Project2B:Product of photoshoot
5.Reflections
1.Lectures
Intro
The fundamental principles of design are: Emphasis, Balance and Alignment, Contrast, Repetition, Proportion, Movement and White Space.


 fig 1.3 CONTRAST |
|
Contrast creates space and difference between elements in your design. Your background needs to be significantly different from the color of your elements so they work harmoniously together and are readable. |


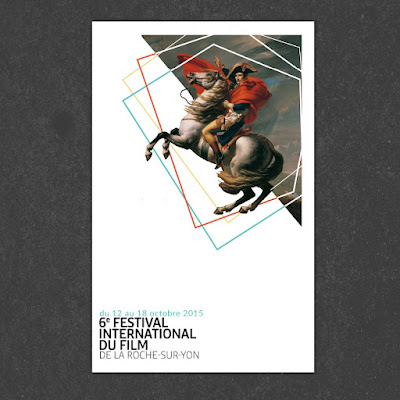 fig 1.7 WHITE SPACE |
| White space (or negative space) is the only one that specifically deals with what you don’t add. White space is exactly that— the empty page around the elements in your composition. |
EFERENCE:
Title: 7 Principles of Poster Design
Link: https://99designs.com/blog/tips/principles-of-design
Title: 7 Principles of Poster Design
Link: https://youtu.be/qp3jHWyPW-E
& Image Blending Mode
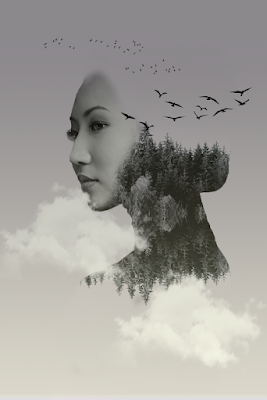
What Is Double Exposure Photography?
 fig1.8 |
Double exposure photography refers to merging multiple images. The goal is to make them surreal, emotional, or humorous. They usually feature silhouettes. You don’t need a double exposure camera, as there are a few other ways you can create them. |
1. Using the Tilt-Shift Effect
If you want to be extra creative, blur one of your photos instead of the entire image.
Or blur everything except for one important detail.
2. Create fake reflection
 fig 1.9 |
There are many ways you can create reflections. One of them is creating a double-exposure with the help of a separate window photo. |
3. Experiment with simple portraits and
details textured
 fig 1.10 |
| Combining something plain with something complicated will give you a balanced result. It will also save a lot of simple photos that you might discard. |
4. Convert your results to Black & White
 fig 1.11 |
It gives them a unique depth and allows you to experiment with something interesting just like film photography. |
 fig 1.12 |
| It would give you a fun and doable challenge. And an opportunity to show very creative sides of yourself. |
 fig 1.13 |
| A random process doesn’t mean it’s not meaningful. Your results might create a story of their own, one that others will find encouraging.
7. Make simple objects look fascinating  fig 1.14 A silhouette of a dull-looking building could become the outline of a starry sky like the photo below. This technique will enhance your imagination. 8. Use Shadow  fig 1.15 You can do anything your heart desires with outlines of this sort. All you have to do is go out, take photos of a few shadows, and turn them into something beautiful PHOTOSHOP : Blend Modes Working with blend modes is almost always an experimental process. Because it’s nearly impossible to predict the results, you always seem to end up experimenting with different modes and Fill Opacities until you get the results you’re looking for.    fig 1.16 A particular blending mode works really well on more difficult subjects like glass, smoke, fire and lightning. Here’s a quick guide:
 fig 1.17 REFERENCE:
week 8:Independent study week Week 9 Digital SurrealismRealism Versus Surrealism - Realism: considers topics from the everyday, commonplace world that we refer to as "reality." It nearly always chooses a non-extraordinary and non-exotic theme and subject matter. Thinking beyond the box is not necessary since it is not "real."  Figure 1.18Realism - Surrealism: A reinterpretation of Realism. It delves into the subconscious, focusing mostly on dream imagery and frequently seeking to warp the commonplace and what we take to be reality. Also surrealism defies logic. Dreams and the workings of the subconscious mind inspire surrealistic art (French for "super-realism") filled with strange images and bizarre juxtapositions. Surrealism is a cultural movement focused on type of arts to express about the artist’s idea themselves.   Figure 1.19 Surrealism Mindset During Creation - "Does this look real?" Surrealism is at its best when it's convincing enough that it could be real, however we obviously know that the subject matter you are creating is nonexistent, thus is not real. - Make it happen to the beat of your ability When you try to approach something challenging, you will learn the skills you may need for next time to make it work. The worst thing you can do is be afraid and back off from your idea, because you would never learn that way. REFERENCE: 1.Incorporating Surrealism Concepts into Your Digital Artwork: 2.Surrealism art and literature: 3.Creating Surrealism in Photoshop: 4.What is Dadaism, Dada Art, or a Dadaist?: 5.Salvador Dalí Spanish artist: |
2
Information manual for digital
photography and imaging modules
Instruction |
week 7 3.Project 2A:DOUBLE EXPOSURE
Exercise 1: Follow the tutorial
finnal work
process


PROJECT 2B :
POSTER DESIGN
Taiwan International Student Design Competition 2024
Theme:
Equality
Please visit this link to study more about the Poster Competition:

PART 1: WEEK 9
Research about your topic
Study and gather all related information about your topic.
I have done poster design for gender equality at the United Nations before, so this assignment is not strange to me.
The Fifth Sustainable Development Goal (SDG 5) of the United Nations aims to achieve gender equality and empower all women and girls. Its main contents include: 1. Eliminate discrimination: end all forms of discrimination against women and girls. 2. Eliminate violence: Eliminate violence against women and girls in the public and private spheres. 3. Eliminate harmful practices: eradicate harmful practices such as child marriage, early marriage, forced marriage and female genital mutilation. 4. Promote leadership: Ensure that women have equal participation and leadership opportunities in decision-making at all levels. 5. Guarantee the right to reproductive health: universal access to sexual and reproductive health and reproductive rights. 6. Promote economic equality: reform laws and practices, and give women equal economic resources and rights. 7. Empowerment with technology: enhance women's use of information and communication technology. 8. Strengthen the legal framework: formulate and strengthen policies and laws that promote gender equality. Achieving these goals not only improves the quality of life of women and girls, but also promotes overall social progress.
fig 1.1 Refer to

fig 1.2 Refer to

fig 1.3 Refer to
2.Write a summary about your topic
PART 2: (WEEK 10)
2. Define your concept
Sketch


PART 3: WEEK 10
3. Start to develop your design projects
1. Draft the digital poster based on your sketch


FINAL POSTER

FINAL POSTER
SUMMARY:
Gender equality is the fifth Sustainable Development Goal set forward by the UN, and it is the subject of this poster. By showing a balance scale, which represents the disparity between male and female position in society, it draws attention to the ongoing problem of gender inequality. The query "Can you face it?" pushes viewers to acknowledge and take action against gender inequality. This poster emphasizes the significance of guaranteeing access to reproductive rights, encouraging equal involvement in decision-making, and ending discrimination, violence, and harmful behaviors against women and girls. In addition to being an issue of social justice, gender equality is essential to the advancement of sustainable global development.
PROJECT 2B :
POSTER DESIGN
https://docs.google.com/presentation/d/1XjzXoWiHtNyRtWPle6jJDE7nXkwNfZ7yaybU1ar4xyA/edit?usp=sharing
PROJECT 2
POSTER DESIGN & DIGITAL IMAGING
https://docs.google.com/document/d/1m5_LY3AzV7ZCEocntO8LRa-HTQMUTDYy_EkMhQrG9xE/edit?usp=sharing
my bloghttps://huangjiaqi0503.blogspot.com/2024/06/digital-photography-and-imaging-project.html
my poster
https://drive.google.com/file/d/1rOCaLSLSluRtdnE0qGSUdVYm14uvE76i/view?usp=sharing


-
The combination of technology and creativity: Learning PS double exposure is not only a challenge to master technology, but also a challenge to creativity. Through continuous trial and adjustment, I have found a lot of interesting combinations and effects.
Patience and meticulousness: It takes a lot of patience and meticulous operation to make a double exposure effect. Especially when using layer masks, minor adjustments will have a significant impact on the final effect.
The importance of practice: Theoretical learning is important, but hands-on practice can consolidate the knowledge you have learned. In repeated practice, I gradually mastered the skills and was able to complete the work independently.
Sum up
Through this study, I not only mastered the production method of Photoshop double exposure effect, but also improved my image processing ability and creative thinking. This kind of learning experience is very fulfilling and interesting.
week 9
Reflection
During the creation of the gender equality poster, we realized the importance of visual design. While the first version conveyed the theme of gender inequality, its impact was limited due to its color scheme and layout. By improving the design in the second version, we found that a simpler design, sharper color contrasts, and clearer text layout greatly enhance the audience's attention and comprehension. Additionally, this reflection process deepened our understanding that gender equality is not just a matter of visual communication but a serious issue that requires collective societal effort to address.
week 10
Reflections
The improved poster, Version 2, is not only more visually appealing but also more effective in communicating the message. Through this process, we learned how optimizing visual elements can significantly enhance the effectiveness of information dissemination. The use of color, text arrangement, and overall harmony of the layout were key focuses during our reflections. This improvement taught us to always prioritize the audience in future design work, emphasizing both practicality and aesthetics, while ensuring the core message is effectively communicated. By applying these principles, we hope to better promote gender equality and raise awareness about this crucial issue.


Comments
Post a Comment