Video and Sound Production EXERCISES

VIDEO AND SOUND PRODUCTION - EXERCISES
23/9/2024- (WEEK1-WEEK4 )
huang jiaqi/0371553
Video & Sound Production / Bachelor of Design in Creative Media
TABLE OF CONTENTS


The shot size determines how large the area that’s visible within the frame.
1.Wide Shot
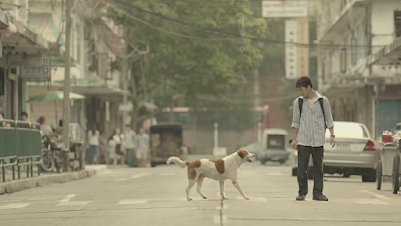
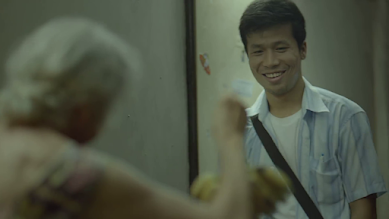
A wide shot includes the entire subject and important objects in the immediate surroundings. If it's used at the beginning of a scene it's often called an "establishing shot”.
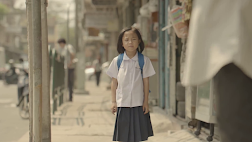
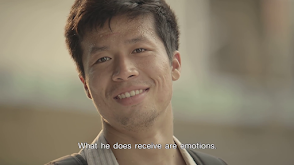
A medium shot shows the subject that are important to understanding - Gesture and expression, from the person waist up, letting hands and the lower half of his body fall outside the frame.
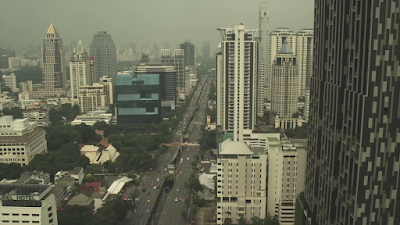
Shows a broad view of the surroundings around the character and conveys scale, distance, and geographical location. It's used to show where character is in his/her environment.
 |
| fig2.1 Summary of shooting angles |
- 45º (¾ angling) Facial modelling is best,Front and side of the face, if properly lighted will appear round and eyes are displayed fully.
- 3 Dimensional solidity When shooting two or more shots, 3D can increase the three-dimensional effect and the performance will be better.
- Reduce parallel lines Adjust the angle of the camera so that the parallel lines gradually decrease, ensuring that the viewer’s gaze is carried into the distance.
- Camera height and camera distance Artistic, dramatic and psychological overtones may be contributed to the story-telling by adjusting the height of the camera to the subject.
- Eye-level angle camera films from the eye level of an observer of average height or from the subject’s eye level.
- Low angle shot camera is tilted upward to view the subject. Low angle shot can make a character look bigger, stronger, or more noble. It also gives the impression of height.
- High angle shot A high angle shot can make a character look smaller, younger, weak, confused, or more childlike.
Screen Direction
Dynamic Screen Direction:
Constant screen travel depicts subject motion in one direction only
Static Screen Direction
The rule enforces the camera stay on a horizontal axis and not cross sections so that it will disorient the viewer.
180º Degree Rule
The minimum angle difference between two shots of the same scene is 180 degrees.
 |
| fig 2.2 180 Degree Rule |
 |
| fig2.3 180 Degree Rule |
The three-act structure is a narrative framework commonly used in drama, film, novels, and other storytelling formats. It divides the entire story into three main parts, each with its own distinct purpose and development:
Act One (Exposition): Introduction
- Act One primarily serves to introduce the background of the story, the main characters, and the primary conflict or problem. This part typically establishes the basic situation of the story, allowing the audience to understand the starting point and initiating the main motivation of the story.
Act Two (Rising Action): Conflict and Development
- Act Two is the development stage of the story, where more conflicts, challenges, and turns occur. The main characters face more difficulties and challenges in this part, their goals may be hindered, or they encounter new obstacles.
Act Three (Climax and Resolution): Climax and Conclusion
- Act Three is the climax and resolution part of the story, where the story reaches its peak and final solution. In this part, the conflicts in the story reach their climax, the main characters face the ultimate test, and ultimately resolve the problem or achieve their goals.
- Act one: exposition, inciting action, turning point into act two
- Act two: rising action, midpoint, turning point into act three (often a “dark night of the soul”)
- Act three: pre-climax, climax, denouement
 |
| fig2.4 The Three Act structure |
 |
| fig2.5 The Three Act structure |
What are the foreground, midground, and background in composition? Provide an image for explanation. What is depth of field? What is deep depth of field? Provide an image for explanation. What is shallow depth of field? Provide an image for explanation.
Foreground, Midground, and Background in Composition:
In visual composition, the foreground, midground, and background are layers that help create depth and spatial organization in an image.
- Foreground: This is the closest area to the viewer, typically where the main subject of the composition might be placed.
fig2.6 Foreground
- Midground: The area between the foreground and background. This is often where secondary elements reside.

fig2.7 Midground
- Background: The farthest part of the scene, providing context or setting for the subject. It might be blurred or detailed, depending on the depth of field.
fig2.7 Background:
Depth of Field:
Depth of Field (DoF) refers to the range of distance in a photograph that appears sharp and in focus. A narrow or shallow depth of field means only part of the image (usually the subject) is in focus, while a deep depth of field means that much of the scene, from foreground to background, is in focus.
Deep Depth of Field:
This occurs when everything in the scene, from the nearest to the farthest object, is in focus. It’s commonly used in landscapes or wide-angle shots where clarity throughout the frame is desired.
Shallow Depth of Field:
This occurs when only a small part of the image is in focus, with the rest of the scene (foreground or background) blurred. It’s often used in portrait photography to isolate the subject and reduce distractions.

fig2.7 Question
One of the standard guidelines used throughout film and television production is the 180-degree rule, as seen in this image. The answers to the three questions are as follows:
What is the rule of 180 degrees?
A fundamental guideline for film and television production is the 180-degree rule. It requires that in order to maintain a consistent screen direction and prevent audience misunderstanding over spatial orientation, the camera must be maintained in an imaginary 180-degree arc. Two characters converse face-to-face in the dialogue scene, for instance. Assuming that there is an "axis" connecting them, the camera must keep shooting on one side of the axis and cannot cross this line.
Which way is the screen oriented?
The direction in which a character or object moves within an image is referred to as the screen direction. The uniformity of the screen orientation is ensured in part by the 180-degree rule. To preserve the audience's understanding of the spatial relationship, for instance, if one character looks from left to right on the screen, the other character should gaze from right to left.
 |
| fig1.1 Video sorting |

Low angle Wide shot
Frontal MCU (soft background)
Frontal MS (soft background)
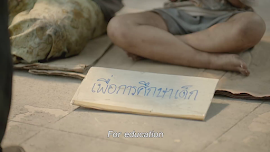
Extreme Close-Up shot
Side angle MS (soft background)
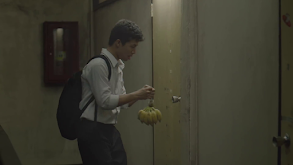
¾ angling MCU shot (with blurry/soft foreground)
Close-Up shot
Eye-Level Medium-Wide shot


 |
| fig1.8Cross dissolution |
Added a message dialog box to the video, and added sound effects when the mobile phone message comes.
 |
| fig1.9 Apple mobile phone message sound effects |
At the end, I added the black transition mentioned in the teacher’s video at the beginning and end of the video.
Lalin Movie
Act Structure:
Act 1: Lalin, the protagonist, attends school in Thailand and, as an internet idol, faces significant public attention. Due to imperfections in her appearance, she becomes the target of online bullying, prompting her to seek refuge in Japan, away from the world and her painful reality.
Act 2: Lalin forms a virtual relationship with Nut, a graphic novelist. They frequently share details of their lives, yet Nut grows increasingly curious about Lalin’s consistent use of a mask and yearns to meet her in person.
Act 3: Nut travels to Japan to meet Lalin, but she, unprepared for this encounter, declines the opportunity. However, upon discovering that Nut’s drawings depict their first meeting, Lalin decides to remove her mask, embracing her true self and her own beauty.
Inciting Incident:
The inciting incident occurs when Nut unexpectedly arrives in Lalin’s city, forcing her to confront her insecurities and fears about facing reality.Midpoint Scene:
The confrontation between Lalin and Nut represents the midpoint, where Lalin’s internal conflict peaks as she, still fearful, rejects Nut and asks him to leave.Climax Scene:
The climax happens when Lalin, after seeing Nut’s drawing, chases after him, choosing to remove her mask and face reality with newfound courage.Theme:
The film’s central theme is self-acceptance, emphasizing the importance of embracing one's true self and inner beauty, despite imperfections or societal judgment.
Everything, Everywhere, All at Once
Act Structure:
Act 1: The narrative introduces Evelyn Wang, her husband Waymond, and their daughter Joy, highlighting the strained dynamics in Evelyn’s family. Her inability to accept Joy's sexuality exacerbates the tension, adding to her growing dissatisfaction with her own life.
Act 2: Evelyn discovers her ability to traverse multiple dimensions and alternate realities, leading her on a journey of self-exploration. She witnesses different versions of her life, searching for purpose and seeking resolution for her internal struggles.
Act 3: Evelyn realizes that familial unity and mutual understanding are essential to overcoming the multiverse's crises. By reconnecting with her family, she finally finds meaning in her life and reconciles with her daughter.
Inciting Incident:
The inciting incident occurs when Evelyn discovers her ability to access different dimensions, a moment that shifts her life into a new direction and reveals the film’s broader conflict.Midpoint Scene:
The midpoint involves a pivotal discussion between Evelyn and her husband about how to confront Jobu, marking a crucial turning point in the film’s narrative and Evelyn’s journey.Climax Scene:
The climax features Evelyn confronting multiple versions of herself across universes, fighting for her family’s survival and ultimately restoring harmony within her fractured relationships.Theme:
The film explores the existential challenge of finding one's place in a world overloaded with possibilities and information. It emphasizes the need for individuals to identify their purpose amidst the chaos, highlighting the importance of family, love, and understanding.
Reflection


Comments
Post a Comment